 Add My Company
Sign In
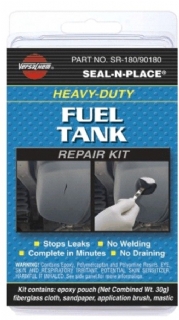
A54. SR-180 FUEL TANK REPAIR KIT
Product Code: PMITW90180

PRODUCT DESCRIPTION: The complete patch kit that permanently repairs gasoline and disesel fuel tank leaks in less than 20 minutes. Repairs pinholes, rust-outs, hairiline cracks and hole up to ½” in diameter
WORKS BEST ON: Use to repair metal tanks and plastic tanks such as fuel tanks, oil pans Does not bond to polyethylene or polypropylene plastics.
PRODUCT FEATURES:
Tensile Strength: 1,500 psi
Color: Grey
Water Resistant
Working Time: 4 – 5 Minutes
Set Time: 8 – 10 Minutes
Can be Handled In: 15 Minutes
Full Bond: 1 Hour
Temperature Range: 40ºF to 200ºF (Temperatures below 40ºF (5ºC) slows the curing time)
Chemical Solvent Resistance: automotive fluids such as gasoline, diesel and kerosene.
Storage: Store in a cool, dry environment.
SURFACE PREPARATION: Protect work area from accidental spills. Slightly roughen repair area. Clean surface by solvent-wiping to remove grease, oil, dirt or other contaminants. For best results, surface to be repair should be above 32ºF.
REMOVAL METHODS: (test inconspicuous area of item to be sure chemicals do not harm surface)
Before epoxy is allowed to dry, remove excess immediately with damp cloth. Can also use mineral spirits or isopropyl alcohol.
After cure:
Metal/Ceramic/Glass: Soak in hot water, if possible. Heat in excess of 350ºF, this will weaken the bond. Solvents that can be used: isopropyl alcohol, acetone, methylene chloride or other solvent.
Fabric: Before epoxy cures, immediately flush fabric with warm water or wipe with a damp cloth. Once epoxy is cured, it is not possible to remove it from the fabric.
HELPFUL HINTS: Heat is generated while the epoxy mixture cures; the more epoxy and hardener that is mixed together.
Equal portions of the hardener and resin must be thoroughly mixed together in order for this product to cure properly. The most common problem with a two-part epoxy product is not mixing it thoroughly; it will not cure and will remain tacky.
Once the product is thoroughly mixed, it can be applied to the repair area(s). Please note, during the mixing process, be sure to push the sides and bottom of the pouch into the mixture so that you are mixing all of the epoxy resin and hardener together.
Have the repair area ready before mixing the epoxy hardener and resin together, so that you can begin repair as soon as the pouch contents are thoroughly mix.
For larger repairs, multiple kits may be used; however, you will need to work with one kit at time.
Removable tape is good for putting on an area that you don’t want any adhesive/epoxy to get on. Before the epoxy cures, remove the tape.
For more information on A54. SR-180 FUEL TANK REPAIR KIT talk to Agriemach Ltd
Enquire Now
List your company on FindTheNeedle.

