 Add My Company
Sign In

*** Please Note: When ordering also specify the termination you require,
ie. Fluke 5627A-6-G (gold pins), plus the Bending Radius required. X = termination ***
Specify “A" (INFO-CON for 914X), “B" (bare wire), “D" (5-pin DIN for Tweener Thermometers), “G" (gold pins), “I" (INFO-CON for 1521 or 1522), “J" (banana plugs), “L" (mini spade lugs), “M" (mini banana plugs), “P" (INFO-CON for 1523 or 1524), or “S" (spade lugs).
All models come without calibration unless calibration is purchased separately.
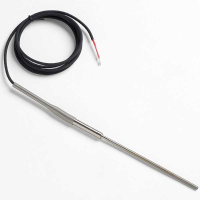
The Platinum Resistance Thermometer (PRT) models 5627A is designed to be a secondary standard interpolating instrument converting temperature to resistance. The 5627A may also be used as a temperature standard for calibration of industrial sensors. The PRT is used with a readout device to detect temperature changes or actual temperature.
The Fluke 5627A is manufactured using a coil suspension element design for increased shock and vibration resistance. It has a mineral-insulated sheath with a minimum bend radius of 19 mm (3/4-inch) for flexibility and durability. (Bend, if any, should be specified at time of order).
Each probe is individually calibrated and includes a NVLAP-accredited report of calibration from the manufacturer, lab code 200706-0.
FEATURES:
Secondary PRT, 152 mm x 4.7 mm (6 x 3/16 in), -200 °C to 300 °C.
Vibration and shock resistant.
NVLAP-accredited calibration included, lab code 200706-0.
Bending Radius: Sheath may be ordered with a bend on a minimum radius of 19 mm (3/4 in) except for 50 mm (2 in) area of sheath near tip.
Fluke 5627-6 Specifications
Resistance
Nominal 100 Ω.
Temperature Coefficient
0.00385 Ω/Ω/ °C nominal.
Temperature Range
?200 °C to 420 °C (5627A-6 and 5627A-9 to 300 °C; transition and cable temperature: 0 °C to 150 °C).
Drift Rate (k=2)
+ 0.04 °C at 0 °C after 100 hours at 420 °C.
Sheath Material
316 Stainless Steel.
Leads
PTFE-insulated, nickel-plated stranded copper, 22 AWG.
Termination
Specify. See Ordering Information.
Time Constant
Four seconds maximum for 63.2 % response to step change in water moving at 3 fps.
Bending Radius
Sheath may be ordered with a bend on a minimum radius of 19 mm (3/4 in) except for 50 mm (2 in) area of sheath near tip. (Fluke lab requires 20 cm [8 in] of unbent sheath to re-calibrate.).
Calibration
Includes manufacturer's NVLAP-accredited (lab code 200706-0) calibration and table with R vs. T values in 1 °C increments from -196 °C to 500 °C (to 300 °C for 5627A-6 and 5627A-9).
ITS-90 coefficients included.
Immersion
At least 100 mm (4 in) recommended.
Calibrated Accuracy? (k=2)
+ 0.026 °C at -196 °C
+ 0.046 °C at 0 °C
+ 0.077 °C at 200 °C
+ 0.124 °C at 420 °C.
Dimensions
152 mm x 4.7 mm (6 in x 3/16 in).
?Includes calibration uncertainty and 100 hr drift.
For more information on Fluke 5627A-6-X Precision Industrial RTD Probe talk to Cuthbertson Laird Group
Enquire Now
List your company on FindTheNeedle.

