 Add My Company
Sign In

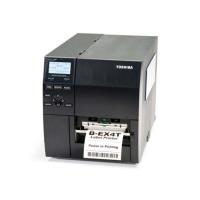
How do I calibrate my Toshiba EX4 Label Printer?
To calibrate the Transmissive (Label Gap) sensor:
First you will need to take some labels from the backing paper and make it so only backing paper (with no labels on it) is going through the printer and only backing paper is under the label gap sensor.
Now switch the printer OFF and switch it back on again holding down the FEED and PAUSE buttons. After a few seconds a menu will appear. Use the arrow buttons to arrow down to SENSOR ADJUST.
Now press PAUSE and use the arrow buttons to highlight TRANS. Now press PAUSE and a sensor voltage will be displayed. If you see 0.0V then the sensor or sensor harness will probably be faulty. Follow the on-screen instructions and press ENTER for 3 seconds. The voltage should now between 3.5V and 4.9V.
Now turn the printer off and after a few seconds turn it back on again. Now test the printer to make sure the sensor is working.
If the sensor still does not work turn the printer on and when ONLINE is displayed press the PAUSE button once until PAUSE is displayed then press and hold the PAUSE button until a menu appears. Arrow down to 2) TRANS. (PRE-PRINT) and press enter. The menu will now prompt you to load the labels and press PAUSE to start the calibration. You should now see Result: OK on the screen. Now turn the printer off and after a few seconds back on again.
If the above does not work repeat the processes above but instead of putting backing paper under the sensor take the labels out completely and make it so there is nothing under the label gap sensor at all.
To calibrate the Reflective (Black Line) sensor:
First you will need to put some label/tag material (blank material not the black line part) under the label gap sensor.
Now switch the printer OFF and switch it back on again holding down the FEED and PAUSE buttons. After a few seconds a menu will appear. Use the arrow buttons to arrow down to SENSOR ADJUST.
Now press PAUSE and use the arrow buttons to highlight REFLECT. Now press PAUSE and a sensor voltage will be displayed. If you see 0.0V then the sensor or sensor harness will probably be faulty. Follow the on-screen instructions and press ENTER for 3 seconds. The voltage should now between 3.5V and 4.9V.
Now turn the printer off and after a few seconds turn it back on again. Now test the printer to make sure the sensor is working.
If the sensor still does not work turn the printer on and when ONLINE is displayed press the PAUSE button once until PAUSE is displayed then press and hold the PAUSE button until a menu appears. Arrow down to 2) REFL. (PRE-PRINT) and press enter. The menu will now prompt you to load the label/tag material and press PAUSE to start the calibration. You should now see Result: OK on the screen. Now turn the printer off and after a few seconds back on again.
For more information on How do I calibrate my Toshiba EX4 Label Printer? talk to Northern Label Systems Ltd
Enquire Now
List your company on FindTheNeedle.

